Revoking Consent for Noggle Knowledge App in Azure Active Directory

In order for Noggle to work with Office365 connectors like OneDrive or Teams, it needs to get consent to read the profile and files for the MS Graph API of the signed-in user. Some people fall in the middle where they are happy to consent as long as they can choose to revoke that consent after they are done playing with the app.

It is not very obvious what you need to do to revoke consent for an Azure Active Directory Application. Even people on the Identity team don’t always know. So let’s talk about how you can do it

Using the My Apps Portal for Individual User Consent

You can revoke individual user consent through the My Apps Portal. Here you should see a view of all applications that you or even your administrator (on your behalf) has consented to:

With applications your admin has consented to, all you can do is open the app, however for apps where you individually consented as a user, you can click “Remove” which will revoke consent for the application.

Using the Azure Portal to Remove Tenant Wide Consent

If you are a tenant administrator, and you want to revoke consent for an application across your entire tenant, you can go to the Azure Portal.  Whether it be for a bunch of users who individually consented or for an admin who consented on behalf of all the users, by simply deleting the application’s service principal, you will remove all OAuth 2 Permission Grants (the object used to store consent) linked to that application. Think about removing the service principal like uninstalling the application from your tenant.

You could delete the service principal a bunch of different ways like through Azure Active Directory PowerShell or through the Microsoft Graph API, but the easiest way for the average administrator is right through the Azure Portal.

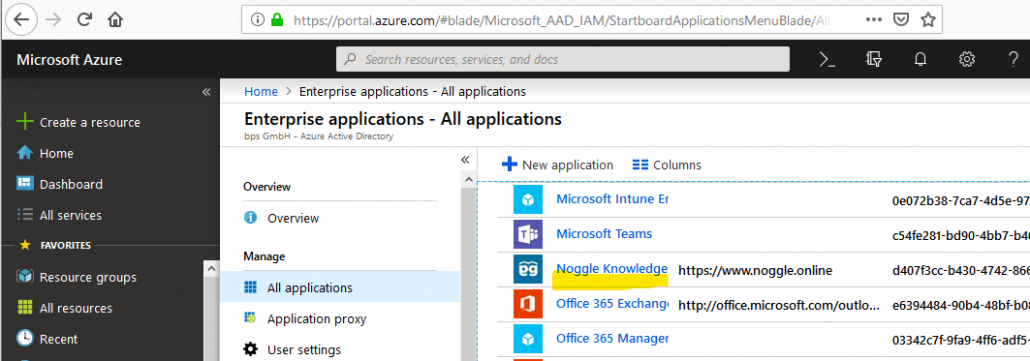
Navigate to the Enterprise Applications blade in the Azure portal:

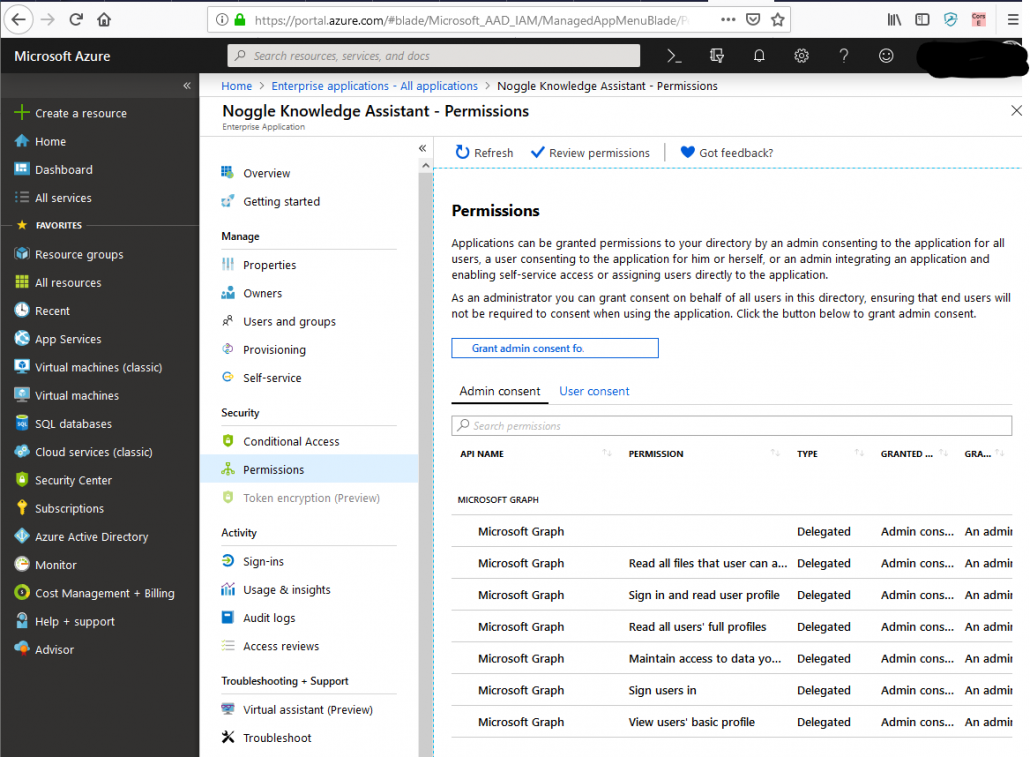
When you click the Noggle application, you will be brought to an “Overview” section, where a tempting button called “Delete” will be at the top. Before you click this button,  you might want to take a peak at the “Permissions” section to see the types of consent that was granted to this application:

Once you feel confident that you want to delete this application, go back to “Overview” and click “Delete”.

The consent associated with the Noggle Knowledge app is now gone for your organization.

PDF Indexing Filter for native Windows10 applications

Info

If you observe that pdf files will not be indexed in your libraries, you need to check for the correct Windows10 PDF Filter. This How-To is only for Win10 – Check other PDF IFilter article for Win7.

PDF Indexing: How-To Inspect and Change the Filter Handlers

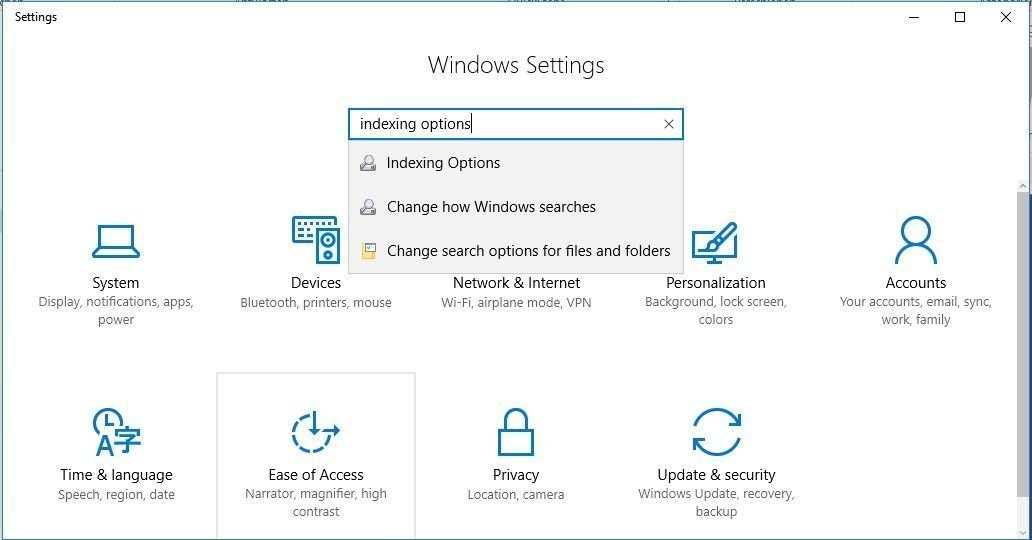
First, open the PDF Indexing Options panel in the Control panel:

Control Panel for PDF Indexing Options

Control Panel for PDF Indexing Options

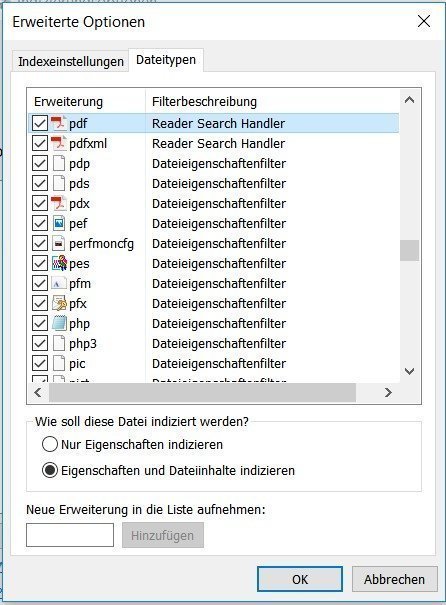
Now click on Indexing Options / Advanced / File Types. This shows you the list of file extensions and the default Filter Handler registered for it. After installing an Adobe Filter, you can see that it adds a Handler for PDF that it calls “PDF Filter”.

Installed PDF Indexing Filter

Installed PDF Indexing Filter

Any indexing of PDF content at this point will use the Adobe Filter. To get PDF indexing working with Windows10 Store Universal Windows Platform Apps like Noggle, you need to use the native Windows10 pdf filter which is already shipped with Windows10. To change it, you need to know the GUID for the filter. The please take a note now:

What’s the GUID for the naitive Windows10 UWP PDF Filter?

Adobe GUID: {E8978DA6-047F-4E3D-9C78-CDBE46041603}
Windows10 GUID: {6C337B26-3E38-4F98-813B-FBA18BAB64F5}

That’s great, but now what if you want to switch back and forth?

Default Handlers in the Registry

How do we find out where the Default handler is configured in the Registry? Open the registry editor by typing RegEdit in the windows search box and start the desktop command.

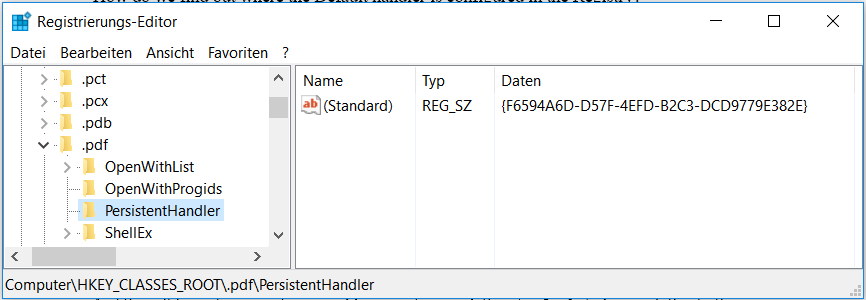
Let’s look at HKEY_CLASSES_ROOT.pdf. In my case, it contains a PersistentHandler sub-key. This GUID is a registry branch that defines the Filter Handler for PDFs.

RegEdit PDF Indexing GUID

Note: this GUID is not constant like the IFilter GUIDs are. Yours will be different.

So let’s take a look at {F6594…..382E} by searching for it. This brings us to HKEY_CLASSES_ROOTCLSID{F6594…..382E}:

RegEdit PDF Indexing Filter Handler

RegEdit PDF Filter Handler

And there it is, under PersistentAddInsRegistered, the (Default or Standard) key pointing to the Adobe GUID of {E8978DA6-047F-4E3D-9C78-CDBE46041603}. As you’ve probably guessed, to change the default handler to the native Windows 10 PDF handler, we just have to replace this GUID with the Windows10 GUID: {6C337B26-3E38-4F98-813B-FBA18BAB64F5}. Let’s try it.

RegEdit PDF Indexing Windows 10 IFilter

RegEdit PDF Windows 10 IFilter

Now let’s take another look at Advanced Indexing Options:

PDF Indexing Win10 Filter activated

PDF Win10 Filter activated

And we’re on the Windows10 “Reader Search Handler” for PDF indexing with UWP apps. That’s it!

Summary

Here is how the registry entries are structured to define the default or standard handler:

HKEY_CLASSES_ROOT.pdf
PersistentHandler
(Default)={PDF Handler GUID}
|
˅
HKEY_CLASSES_ROOTCLSID{PDF Handler GUID}
PersistentAddInsRegistered
{Some other GUID}
(Default or Standard)={Filter GUID} <– Change this

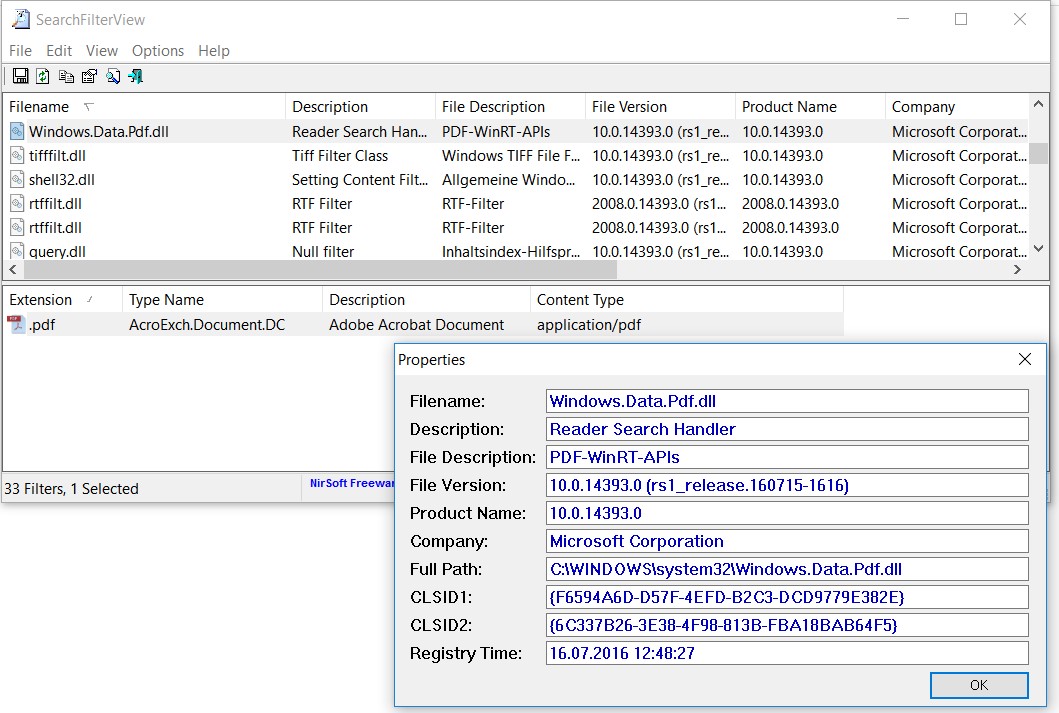
Finally, you can check if the correct iFilter is available via the SearchFilterView Tool:

SearchViewFilter Tool

SearchFilterView Tool with correct Windows10 Filter handler activated for the extension .pdf


References:

How To Article for Win7 / Desktop Apps:

Tool to check available filter components:

Technical Info from Microsoft:

https://msdn.microsoft.com/en-us/library/windows/desktop/dd940433(v=vs.85).aspx


Search OneDrive Documents – Office365 Integration

Search OneDrive Documents – How to integrate Office365 with Noggle

Noggle has direct interfaces to quickly find and search OneDrive documents via Office365 API integration.

Adoption of SharePoint Online, Office365 and OneDrive is high. Some companies have standardized on Office365 with OneDrive for Business as an document management platform while others use different storage locations for sharing files. In either situation, the reality is that business workers store information in multiple places — SharePoint, network file shares and cloud storages. To find that information is often a frustrating task of switching from application to application.

Noggle for Microsoft Office 365 enable information workers to easily and efficiently search, find and access documents from one single unified front-end desktop application. Noggle integrates OneDrive, OneDrive for Business and Office365 SharePoint Online storage locations to build and share knowledge libraries.


Noggle has registered apps to integrate with Microsoft OneDrive and OneDrive for Business storage accounts. Choose “OneDrive” or “OneDriveBusiness” as provider when creating a new noggle library. During library initialization, you must authorize the Noggle app to get access to your OneDrive account. The authorization flow will start automatically and only needs to be processed once.

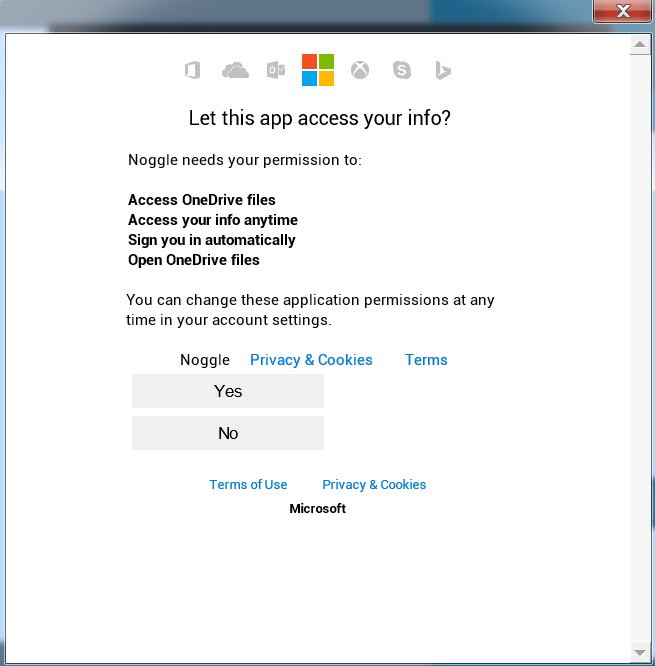
OneDrive Authorization Flow

Login with your OneDrive Microsoft account data and approve the Noggle application permission request.

OneDrive Personal

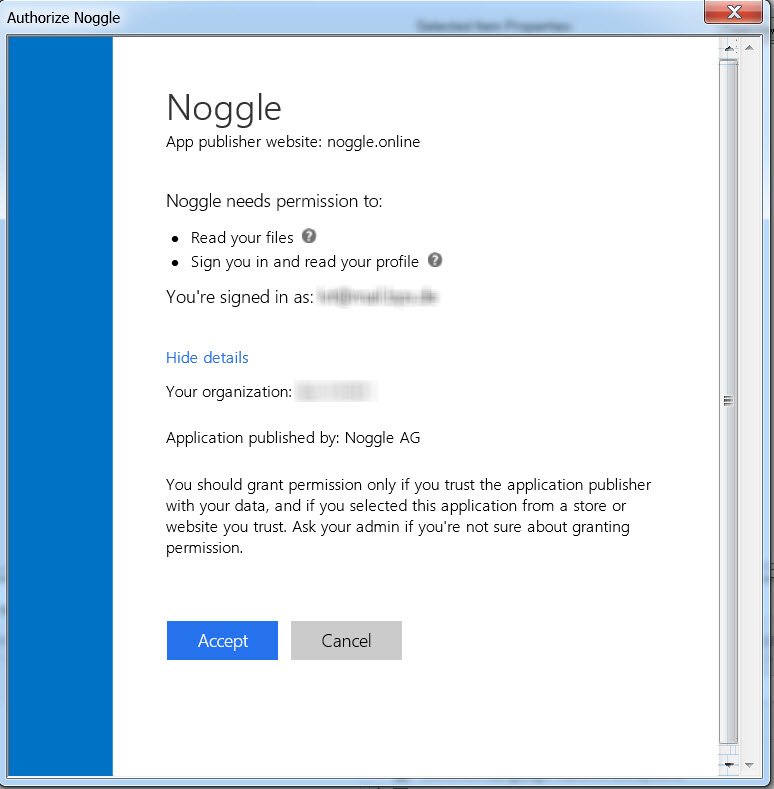
OneDrive for Business Authorization Flow

1. Login with your Office365 account to authorize the noggle application:

Search OneDrive Documents - Noggle Login

2. Confirm that Noggle is allowed to read your OneDrive files:

Search OneDrive Documents - Noggle Login Confirmation

This procedure is only needed once for initial account authorization. You can revoke OneDrive storage access for Noggle at anytime via your Office365 portal.

How to revoke access:

If you want to revoke access, login to your Office365 account, navigate to “My App permission”. Follow this article for detailed instructions

Revoking Consent for Noggle Knowledge App in Azure Active Directory

I cant find Excel files with macros, what to do?

I cant find Excel files with macros, what to do?

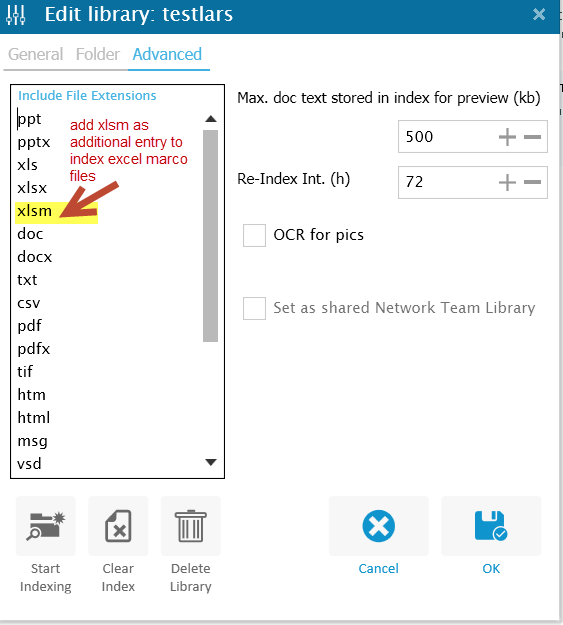
Excel files including macros are saved with the extension .xlsm. This filetype is not indexed by standard settings.

You need to include Excel marco file extensions either in the seperate libary setting (browse over the library entry and press the settigs button):

exlsm_indexing_filetype


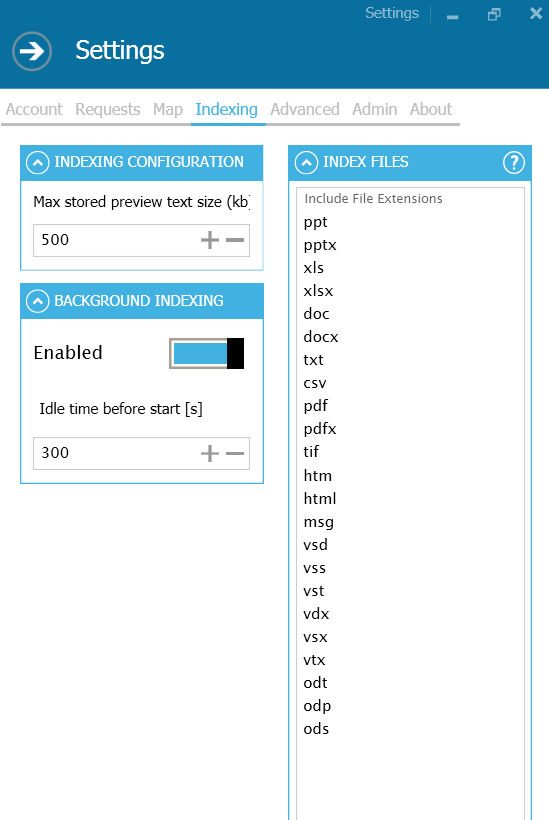
Or, if you want to have Excel macro files included in every library by standard, enter the file extension in the general application settings panel -> Indexing)

standard_filetypes_settings

Settings – Admin Tab

Online Help – Settings Admin TAB

The System tab is your main hub for application information and general settings. The panel allows you to configure and customize your Noggle experience.

Settings Panel

Settings Panel


Indexing Cloud Drives and Folder

Indexing cloud drives and folders

In general noggle can index and search all folders and files which are accessible via the Windows file explorer. So if you have linked a cloud account as a file share which is accessible via the windows explorer, it is also accessible for noggle. However, often the “linked” cloud folder only represent synced files. Therefore it is more usefull to connect directly to your cloud drived and index and search all files which are on the cloud drive. Noggle allows indexing cloud drives with ease and just one click.

Direct Dropbox integration available for Noggle

Dropbox is a cloud solution that is great for storing content and information. Finding and using the content stored in Dropbox isn’t easy. That’s why Noggle is such a great addition to your Dropbox experience. Noggle makes it simple and fast to find what is stored and hidden in Dropbox.

Noggle automatically indexes documents and their content within your selected Dropbox folders. Noggle identifies the most relevant items, and visually displays the results – even if these files are not on your computer and only located in the cloud. Noggle finds them and included the search results on your screen.

Here is the Dropbox integration link: https://www.noggle.online/knowledge-base/dropbox-integration/

General Solutions

However, you can use tools like NetDrive to connect to your network and cloud folders. This way, you can directly select any folder on Dropbox or Google Drive directly as a noggle path that should be indexed.


Check installed iFilter components

Info:  ** For advanced user only **

When you search the content of files with Noggle, it uses the right search iFilter plugin according to the file extension. The following free utility allows you to easily view the search filters installed on your system and the file extensions that are associated with them, as well as it allows you to easily add or remove file extensions for these filters.

Download Tool to check installed iFilter components

Text Search: Querry Syntax

Text Search: Querry Syntax


This article describes how to structure direct text search requests.

Fields


When performing a search you can either specify a field, or use the default field “Text”. You can search any field by typing the field name followed by a colon “:” and then the term you are looking for.
As an example, let’s assume the library index contains two fields, file and text and text is the default field. If you want to find the document entitled “The Right Way” which contains the text “don’t go this way”, you can enter:

File:”Presentation xyz” AND Text:go
or
File:”Presentation xyz” AND right

Since text is the default field, the field indicator is not required.

Note: The field is only valid for the term that it directly precedes, so the query

File:Presentation xyz right

Will only find “Presentation” in the title field. It will find “xyz” and “right” in the default field (in this case the text field).

Wildcard Searches


To perform a single character wildcard search use the “?” symbol. To perform a multiple character wildcard search use the “*” symbol.
The single character wildcard search looks for terms that match that with the single character replaced. For example, to search for “text” or “test” you can use the search:

te?t

Multiple character wildcard searches looks for 0 or more characters. For example, to search for test, tests or tester, you can use the search:

test*

You can also use the wildcard searches in the middle of a term.
te*t

Note: You can only use a * or ? symbol as the first character of a search if activated in the settings menu.

Fuzzy Searches


Fuzzy searches are based on the Levenshtein Distance, or Edit Distance algorithm. To do a fuzzy search use the tilde, “~”, symbol at the end of a Single word Term. For example to search for a term similar in spelling to “roam” use the fuzzy search:

roam~

This search will find terms like foam and roams.

An additional (optional) parameter can specify the required similarity. The value is between 0 and 1, with a value closer to 1 only terms with a higher similarity will be matched. For example:
roam~0.8

The default that is used if the parameter is not given is 0.5.

Proximity Searches


Finding words are a within a specific distance away. To do a proximity search use the tilde, “~”, symbol at the end of a Phrase. For example to search for “transform” and “infrastructure” within 10 words of each other in a document use the search:

“transform infrastructure”~10

Range Searches


Range Queries allow one to match documents whose field(s) values are between the lower and upper bound specified by the Range Query. Range Queries can be inclusive or exclusive of the upper and lower bounds. Sorting is done lexicographically.
LastModified is saved in the sortable string format ISO 8601.

Therefore you can apply range searches to the LastWriteTime field. Format: yyyy-MM-ddTHH:mm:ss

+LastModified:[2014 TO 2015?]

This will find documents whose LastWriteTime fields have values between 2014 and 2015, inclusive. Note that Range Queries are not reserved for date fields. You could also use range queries with non-date fields:

File:{Aida TO Carmen}

This will find all documents whose file names are between Aida and Carmen, but not including Aida and Carmen.
Inclusive range queries are denoted by square brackets. Exclusive range queries are denoted by curly brackets.

Boosting a Term


Providing the relevance level of matching documents based on the terms found. To boost a term use the caret, “^”, symbol with a boost factor (a number) at the end of the term you are searching. The higher the boost factor, the more relevant the term will be.
Boosting allows you to control the relevance of a document by boosting its term. For example, if you are searching for

transform IT

and you want the term “transform” to be more relevant boost it using the ^ symbol along with the boost factor next to the term. You would type:

transform^4 IT

This will make documents with the term transform appear more relevant. You can also boost Phrase Terms as in the example:

“transform IT”^4 “Infrastructure”

By default, the boost factor is 1. Although the boost factor must be positive, it can be less than 1 (e.g. 0.2)

Boolean Operators


Boolean operators allow terms to be combined through logic operators. Supporting AND, “+”, OR, NOT and “-” as Boolean operators (Note: Boolean operators must be ALL CAPS).
The OR operator is the default conjunction operator. This means that if there is no Boolean operator between two terms, the OR operator is used. The OR operator links two terms and finds a matching document if either of the terms exist in a document. This is equivalent to a union using sets. The symbol || can be used in place of the word OR.
To search for documents that contain either “transform IT” or just “transform” use the query:

“transform IT” transform

or

“transform IT” OR transform

AND

The AND operator matches documents where both terms exist anywhere in the text of a single document. This is equivalent to an intersection using sets. The symbol && can be used in place of the word AND.
To search for documents that contain “transform IT” and “Infrastructure” use the query:

“transform IT” AND “Infrastructure”

+

The “+” or required operator requires that the term after the “+” symbol exist somewhere in a field of a single document.
To search for documents that must contain “transform” and may contain “infrastructure” use the query:

+transform infrastructure

NOT

The NOT operator excludes documents that contain the term after NOT. This is equivalent to a difference using sets. The symbol ! can be used in place of the word NOT.
To search for documents that contain “transform IT” but not “Infrastructure” use the query:

“transform IT” NOT Infrastructure

Note: The NOT operator cannot be used with just one term. For example, the following search will return no results:
NOT “Infrastructure”

The “-” or prohibit operator excludes documents that contain the term after the “-” symbol.
To search for documents that contain “transform IT” but not “Infrastructure” use the query:

“transform IT” -Infrastructure

Grouping


Use parentheses to group clauses to form sub queries. This can be very useful if you want to control the boolean logic for a query.
To search for either “transform” or “IT” and “infrastructure” use the query:

(transform OR IT) AND infrastructure

This eliminates any confusion and makes sure you that website must exist and either term transform or IT may exist.

Field Grouping


Using parentheses to group multiple clauses to a single field.
To search for a text that contains both the word “IT” and the phrase “infrastructure provider” use the query:

Text:(+IT +”infrastructure provider”)

Escaping Special Characters


Escaping special characters that are part of the query syntax. The current list special characters are
+ – && || ! ( ) { } [ ] ^ ” ~ * ? :

To escape these character use the before the character. For example to search for (1+1):2 use the query:
(1+1):2